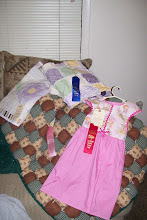
Time for our first meeting: Please let me know which meeting you're planning to attend so that I can plan accordingly. I haven't had any feedback on what you'd like to learn at this class so we're going to learn about some quilting basics and I'll have some handouts for you(which is why I need to know how many of you are coming to each meeting). I will also use this meeting to get a feel for how you want this group to serve you. If you have an existing project or a meddlesome sewing machine please bring it to this class.
Also, please let me know if you will be bringing children to this meeting, and how many. I want to be prepared.
The first meeting will be:
Saturday, May 4 at 11am at my home
The second meeting will be:
Monday, May 13 at 9am at my home
Both meetings will cover the same topics. I have a few "group project" ideas too. Hope to see you all there.
If you have any future suggestions for days and times for classes please let me know. I haven't heard from anyone yet on this, but wanted to get started. If you don't have a machine don't be discouraged. I have a few so you can still participate.
Thanks,
Thursday, April 25, 2013

Quilt Group Class Topic Options
I'd like to meet 2x monthly, once during the day and once in the evening (for those busy during the day). The same lesson will be taught both times so you don't have to try to make it to both classes.
Feel free to ask all the questions you want, this group is a great place for that because many of us may have the same question and here we can all discuss the answers.
Here are some topics to cover:
1.Basic Sewing
A. When to use what stitch on your machine
B. How to make & cut a button hole (and other fastener hints)
C. How to use & read a pattern
D. How to MAKE & mess around with a pattern
-seam allowances
-old garments get a makeover
-test garments
E. Basic repairs
2. Quilting
-triangle measurement cheats
-quilt back & fabric quantity cheats
-essential tools
A. Hand Work
-English Paper Piecing
-Yo Yos
-Cathedral Windows
-Applique
-Embellishments
B. Machine Work-Applique-Basic piecing
-Paper piecing
-Curves
-Fussy cutting
-Crazy Quilting
-Quilt Specific
1.Cheat: Texas Star
2.Rag Quilt
3.Stack & Whack
4.I spy
5.Bargello
C. Finishing
-Edges & binding
-Batting & back
-Sashing & borders
-Threads & quilting
1.hand quilting
2.machine quilting
3.tying
Thursday, October 28, 2010
Time Flies
I'll be adding some new things and updating this blog soon. Being in the middle of a 6 month move slows things down quite a bit.
I've added and updated some of the links to the right, check them out!
I've added and updated some of the links to the right, check them out!
Wednesday, April 21, 2010
Quiet Book Classes
Well, classes have been going for a while, and I haven't posted anything. Most of the information is on Facebook.
However, I'll post some generals here:
Class Dates & Times....
(If you need to bring your children and aren't opposed to them watching TV, let me know and I'll see if I can secure the TV keys).
Also, the last class will be Saturday, May 1st! For anyone who isn't finished by that time and still has questions, let me know and I'll be happy to help at my home (I'm just not excited about hauling all of my class stuff to the commons with no hubby and kids in tow). It'll be nice to help all those who haven't finished on a one-on-one basis. Also, some of the women who have/are finished may be willing to help too.
However, I'll post some generals here:
Class Dates & Times....
Every Thursday 7-9 pm at the Ridge Crest Common Building
Every Saturday 1-4 pm at the Ridge Crest Common Building
(If you need to bring your children and aren't opposed to them watching TV, let me know and I'll see if I can secure the TV keys).
Also, the last class will be Saturday, May 1st! For anyone who isn't finished by that time and still has questions, let me know and I'll be happy to help at my home (I'm just not excited about hauling all of my class stuff to the commons with no hubby and kids in tow). It'll be nice to help all those who haven't finished on a one-on-one basis. Also, some of the women who have/are finished may be willing to help too.
Thursday, December 3, 2009
Christmas Decor
I've been pretty pathetic at updating anything lately, but here's the "skinny". We're working on Christmas decor and the next class is scheduled for December 12 at 1pm. If, however, you want to start your patterns for tree skirts and stockings etc... now, give me a call (x5026) and I'd be glad to get you started with a shopping list & patterns.
Remember, you can ALWAYS call me & I'll be happy to help. Happy Sewing!
Remember, you can ALWAYS call me & I'll be happy to help. Happy Sewing!
Friday, October 10, 2008
8th International Art Competition
I finally did it. My 8 collective hours of sleep in the last 3 days have finally paid off, as well as two years of work. Here are a few photos.


I'd like to express special thanks to all of my friends who have helped, offered to help and encouraged me to complete this work. I'd also like to thank Jessica Fort for taking the wonderful pictures!
Friday, September 19, 2008
Next Class
October presents new challenges because we're moving classes from the first and third Thursday to the second and 4th Thursday. This means that we won't have 2 classes during the months of December and November. The next class will be held on Thursday, October 9, the next on Thursday, October 23. Good luck everyone and remember, if you have any questions call, e-mail or comment if you can. See you in a few weeks!
Saturday, September 13, 2008
Assembly Instructions

Here are some starting directions for your quilt. Gather your materials and make a plan. Alternate colors or do whatever you do to make your quilt color pattern the way you want it. Use graph paper to determine where you want each different fabric square to be when you sew it together.

First, cut your fabric & batting/flannel into the desired number of 6" or 9" squares (if you are doing a pieced back cut that fabric as well).


The next step is to sew an "X" onto each pinned square group.

Once all of your "X"s are sewn you'll need to sew around the entire square creating a 1/2" seam (1/4" seam if you want, this will result in a smaller "rag" and slightly larger quilt). This will give you a guide to follow as we complete the quilt as well as create a cutting guide for the "ragging". I recommend sewing this 1/2 seam two times on all squares to strengthen the seam to stand up to the cutting and fraying in the "ragging" process. Some sewing machines have a stitch that will automatically sew this seam 3x on a single pass, if your machine has this feature, use it! For those of you who are doing this by hand, double up your thread on your needle and you'll be fine.

Now all you need to do is sew the squares together (right sides/top side out) using a 1/2" seam allowance. Sew each row together in long strips and then sew the rows to each other to make the quilt. Sew intersecting seams open to ease in cutting.
Let me know if you have any questions or need any clarification. I try to make the instructions clear, but what is clear to me may not be to someone else.
Thanks for all your help and support.
Tuesday, September 9, 2008
I've had a request for yardages for a larger quilt so here they are. If it's not large enough, let me know. This quilt is 72" square (6 feet square), but it has 9" cut/8" finished squares. This square size will be better proportioned for a larger quilt and it will save on fabric costs because you'll have fewer seams to sew and less seam allowance.


3 color quilt=
Color 1= 2 yards (28 squares at 9")
Color 2= 2 yards (25 squares at 9")
Color 3= 2 yards (28 squares at 9")
*Center batting, or flannel=5 ½ yards (81 squares at 9")
*Backing (SOLID)= 5 yards
*Backing (PIECED) = 5 ½ yards (81 squares at 9")
4 color quilt=
Color 1= 1 ½ yards (21 squares at 9”)
Color 2= 1 ½ yards (20 squares at 9”)
Color 3= 1 ½ yards (20 squares at 9”)
Color 4= 1 ½ yards (20 squares at 9”)
*See above yardage guides for batting/flannel, and preferred backing.
5 color quilt=
Color 1= 1 ¼ yards (16 squares at 9”)
Color 2= 1 ¼ yards (16 squares at 9”)
Color 3= 1 ¼ yards (16 squares at 9”)
Color 4= 1 ¼ yards (16 squares at 9”)
Color5= 1 ½ yards (17 squares at 9”)
*See above yardage guides for batting/flannel, and preferred backing.
6 color quilt=
Color 1= 1 ¼ yards (15 squares at 9”)
Color 2= 1 ¼ yards (14 squares at 9”)
Color 3= 1 ¼ yards (13 squares at 9”)
Color 4= 1 yard (12 squares at 9”)
Color 5= 1 ¼ yards (13 squares at 9”)
Color 6= 1 ¼ yards (14 squares at 9”)
*See above yardage guides for batting/flannel, and preferred backing.
We also have one girl in the class who is using flannel with denm for her quilt. This was she doesn't have to use any batting or flannel in the between the two facing fabrics. If any of you have any old jeans that will work for this purpose now's the time to pull 'em out!


3 color quilt=
Color 1= 2 yards (28 squares at 9")
Color 2= 2 yards (25 squares at 9")
Color 3= 2 yards (28 squares at 9")
*Center batting, or flannel=5 ½ yards (81 squares at 9")
*Backing (SOLID)= 5 yards
*Backing (PIECED) = 5 ½ yards (81 squares at 9")
4 color quilt=
Color 1= 1 ½ yards (21 squares at 9”)
Color 2= 1 ½ yards (20 squares at 9”)
Color 3= 1 ½ yards (20 squares at 9”)
Color 4= 1 ½ yards (20 squares at 9”)
*See above yardage guides for batting/flannel, and preferred backing.
5 color quilt=
Color 1= 1 ¼ yards (16 squares at 9”)
Color 2= 1 ¼ yards (16 squares at 9”)
Color 3= 1 ¼ yards (16 squares at 9”)
Color 4= 1 ¼ yards (16 squares at 9”)
Color5= 1 ½ yards (17 squares at 9”)
*See above yardage guides for batting/flannel, and preferred backing.
6 color quilt=
Color 1= 1 ¼ yards (15 squares at 9”)
Color 2= 1 ¼ yards (14 squares at 9”)
Color 3= 1 ¼ yards (13 squares at 9”)
Color 4= 1 yard (12 squares at 9”)
Color 5= 1 ¼ yards (13 squares at 9”)
Color 6= 1 ¼ yards (14 squares at 9”)
*See above yardage guides for batting/flannel, and preferred backing.
We also have one girl in the class who is using flannel with denm for her quilt. This was she doesn't have to use any batting or flannel in the between the two facing fabrics. If any of you have any old jeans that will work for this purpose now's the time to pull 'em out!
Friday, August 29, 2008
Next Class
Our next Formal class will be on Thursday, September 18 at 7PM at Ridge Crest Commons. We will have a sew-session on Thursday, September 4th at 7PM but it is an informal Q&A day, I'll help with the current project (Rag Quilts) and also help with any other projects you may have in que (such as mending holes in your husbands pants, etc.). Happy Sewing, all!!!
Sunday, August 24, 2008
RAG TIME!!!


Here are 4 color examples of a rag quilt. The first one (in pinks) is a 3 color combination; the second one (blue & green) is a 4 color combination; the third one (in blue & purple) is a 5 color combination; and the fourth one (in muted tones) is a 6 color combination. If you want to put more colors in your quilt let me know and I'll get you the yardage for each color. Also, each of the quilts are going to be "Crib Sized" (45"x60") if you want to make a quilt that is smaller or larger that this let me know and I'll figure the yardage for that.
Each square will be cut in a 6"x6" square, and I've allowed for a 1/2" seam allowance to allow for the "ragging". Let me know if you want a solid back or a pieced back and I can give you specific instructions for the assembly, according to your preference. You can also lay out your fabrics in your own pattern, it can look like a heart, diamond, diagonal, etc...
The quilts require a lot of squares, but I have 2 rotary cutters (I might be able to get 2 more from my sister before class) to aid in the cutting. If you'd like to cut your squares prior to class and want to use the rotary cutter, let me know and we'll get you started.
The fabric yardages are as follows:
3 color quilt=
Color 1= 1 1/4 yards (36 squares at 6")
Color 2= 1 1/4 yards (36 squares at 6")
Color 3= 1 1/4 yards (36 squares at 6")
*Center batting, or flannel=3 1/2 yards (108 squares at 6")
*Backing (SOLID)= 2 yards
*Backing (PIECED) = 3 1/2 yards (108 squares at 6")
4 color quilt=
Color 1= 1 yard (27 squares at 6")
Color 2= 1 yard (27 squares at 6")
Color 3= 1 yard (27 squares at 6")
Color 4= 1 yard (27 squares at 6")
*See above yardage guides for batting/flannel, and preferred backing.
5 color quilt=
Color 1= 1 yard (22 squares at 6")
Color 2= 1 yard (22 squares at 6")
Color 3= 1 yard (22 squares at 6")
Color 4= 1 yard (21 squares at 6")
Color 5= 1 yard (21 squares at 6")
*See above yardage guides for batting/flannel, and preferred backing.
6 color quilt=
Color 1= 2/3 yard (18 squares at 6")
Color 2= 2/3 yard (18 squares at 6")
Color 3= 2/3 yard (18 squares at 6")
Color 4= 2/3 yard (18 squares at 6")
Color 5= 2/3 yard (18 squares at 6")
Color 6= 2/3 yard (18 squares at 6")
*See above yardage guides for batting/flannel, and preferred backing.
Good luck all, and let me know if you have any questions!
Wednesday, August 20, 2008
1st Class Start's NOW!
The first quilting class for the Pocatello University 3rd Ward starts Thursday, August 21, 2008 at 7pm at the Ridge Crest Commons.
In the next several months I plan to teach lessons where we will learn to make and work on the following projects:
1-Crocheting
2-Embroidery
3-Knitting
4-Basic Sewing & Quilting
5-Rag quilts
6-Puff quilts
7-Paper piecing
8-Hand quilting
9-Aprons & Smocks
10-Sundresses
11-Boys clothes
12-PJs
For the quilt based lessons I will try to get some fabric from the Humanitarian Aid Center so that we can learn the skills without "breaking the bank". Then, we can donate the finished quilts back to the Humanitarian Aid Center.
For each class I will also bring a few samples of the finished project so that we can see how our efforts will pay off.
I would appreciate an RSVP to classes so that I know approximately how many patterns, handouts, needles, etc. that I need to bring. I some cases we may have to share a little bit.
If you have any questions about sewing, what's coming up next in classes or anything else let me know by phone, e-mail or comment to this blog. My phone# is x5026 and my e-mail is trista_hibberd @ yahoo.com
See you in class...or church...whenever...
In the next several months I plan to teach lessons where we will learn to make and work on the following projects:
1-Crocheting
2-Embroidery
3-Knitting
4-Basic Sewing & Quilting
5-Rag quilts
6-Puff quilts
7-Paper piecing
8-Hand quilting
9-Aprons & Smocks
10-Sundresses
11-Boys clothes
12-PJs
For the quilt based lessons I will try to get some fabric from the Humanitarian Aid Center so that we can learn the skills without "breaking the bank". Then, we can donate the finished quilts back to the Humanitarian Aid Center.
For each class I will also bring a few samples of the finished project so that we can see how our efforts will pay off.
I would appreciate an RSVP to classes so that I know approximately how many patterns, handouts, needles, etc. that I need to bring. I some cases we may have to share a little bit.
If you have any questions about sewing, what's coming up next in classes or anything else let me know by phone, e-mail or comment to this blog. My phone# is x5026 and my e-mail is trista_hibberd @ yahoo.com
See you in class...or church...whenever...
Sunday, June 22, 2008
Any Questions?
This blog is just starting out. I'm trying to locate some of the websites that have helped me along my way as a quilter. I will also post pictures of my latest work. If you have any quilting questions, or coments, feel free to ask them as a "comment" to this post.
I would love to hear from you... Tell me about your quilting adventures, triumphs and not-so-triumphant experiences. My next post will address your questions, prompt discussion or talk about quilting adventures in my quilting group. Even if you are not in this group.... feel free to join in the discussions we have.
I would love to hear from you... Tell me about your quilting adventures, triumphs and not-so-triumphant experiences. My next post will address your questions, prompt discussion or talk about quilting adventures in my quilting group. Even if you are not in this group.... feel free to join in the discussions we have.
Subscribe to:
Posts (Atom)